OpenSUSE and SLES (SuSE Linux Enterprise Server) both come with AutoYaST which is a very powerful tool that allows administrators to quickly and easily deploy servers that have an identical configuration for rapid server deployment.
In this three part series we will explore creating a repository for use with multiple systems, creating and customizing the AutoInstall file, and finally running through an install procedure.
Part 2 – Creating and Customizing the AutoInstall file
In this part we will look at creating an AutoInstall file for use with AutoYast.
Check out Part 1 – Creating a repository for use with multiple systems
For this part you will need a machine with OpenSUSE installed, the latest version would be best (although I think it should work with older versions, however I haven’t tested this theory).
Required Packages:
- autoyast2
- autoyast2-installation
In the next section we look at many different options. There are lots of things to explore, but I will leave this up to you. We will go through the basics:
- Disk Partitioning
- Network Setup
- Package Selection
- Users and Groups
- System Services (Runlevels)
- Basic Post Install Scripting
Firstly access YaST from either a X Windows session or from the Command Line (The screen shots are all from the command line version but the same rules should apply).
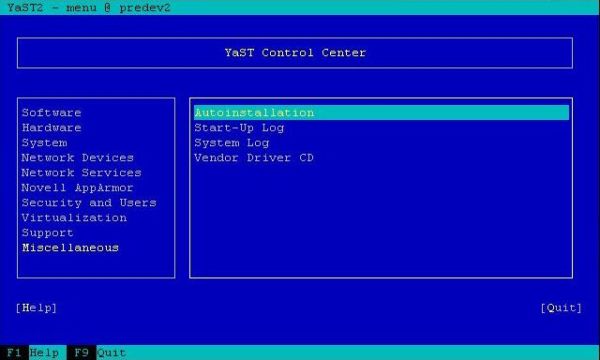
Goto the “Miscellanous – Autoinstallation” screen
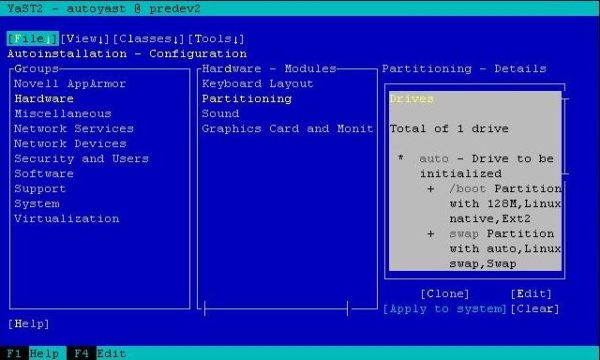
Disk Partitioning
In this section I found it best to use “Auto” for the device. This way the same file works between my test server in VM, through to my HP Servers with RAID configurations.
For the most part you will just need to enter the details you want/need. But there are two things that needs to be pointed out with regard to partition sizes. What you can do is build a partition with size Auto (this is best used on your swap partition) and also with size Max which will fill the rest of the drive’s free space. So the layout I commonly use is:
- /boot with 128mb – EXT2
- SWAP with Auto
- / with 15GB – EXT3
- /var or /home with Max, EXT3 (Depending on the role of the server, typically /home for development/webservers and /var for database/mail servers)
Unfortunately, if you need to use software RAID Autoyast/Autoinstall will not work for you.

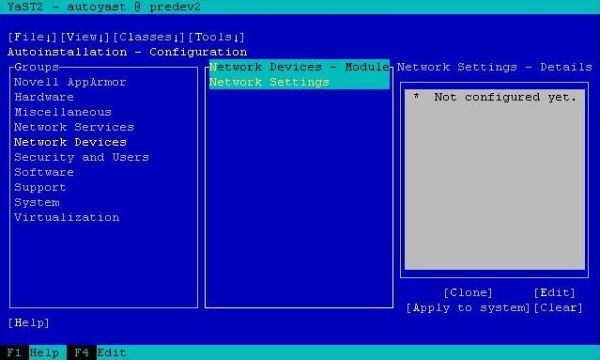
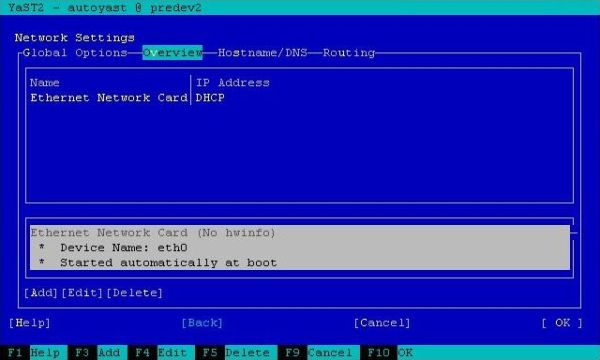
Network Setup
In the Network Settings screen click on Add.
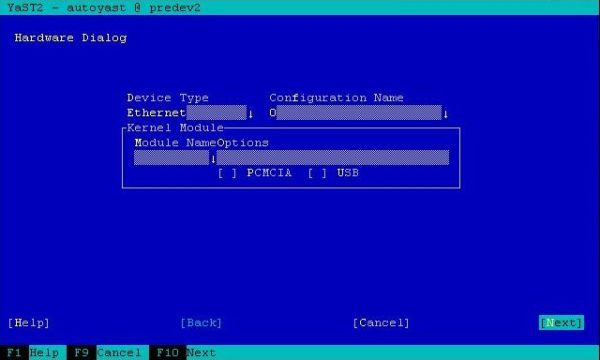
Leave the defaults on the Hardware Dialog Screen (unless you want to change from Eth0 to Eth1,2,3….N, change the number in the Configuration Name Section).
Fill in the Network Card Setup screen with the options you require (ie, DHCP, Static Address, Additional Interface aliases).
Now back in the Network Settings screen go to Hostname/DNS and fill in the appropriate details there (Please note, this is one of the only things that needs to be changed for each server build, or alternatively you could build your servers with a generic name and change them after build).
Next fill in the required details in Routing and your done.
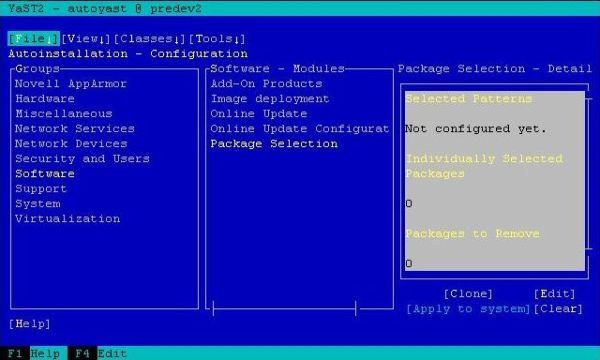
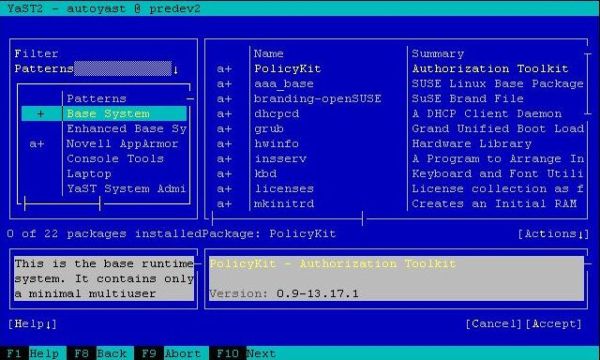
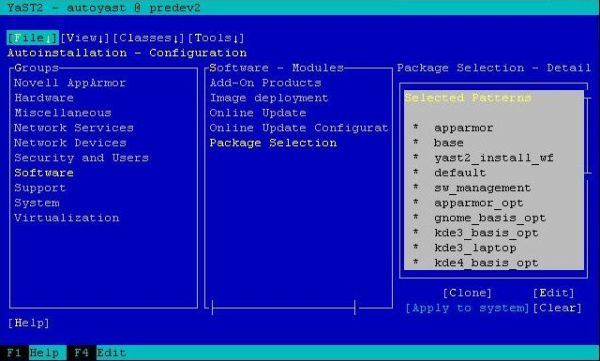
Package Selection
This section is relatively easy, all you need to do is fill in the details as you would for any installation. (The catch is you will first of all need to use the filter to display “Patterns” then at a bare minimum select “Base System”).
Users and Groups
Go to “Security and Users – User and Group Management” and at a bare minimum edit the Root user and set a password (if you don’t do this then you will not be able to login to the machine after it has been built).
At this point you can make any customisations you require for Users and Groups, as a best practice measure you should also create a non-root user and set a password for that account too.
System Services
You will also need to change the default system runlevel if you want a console only server, to do this goto “System – System Services (Runlevel)” then click edit.
Set the default runlevel to “3: Full multiuser with network” and then click ok.
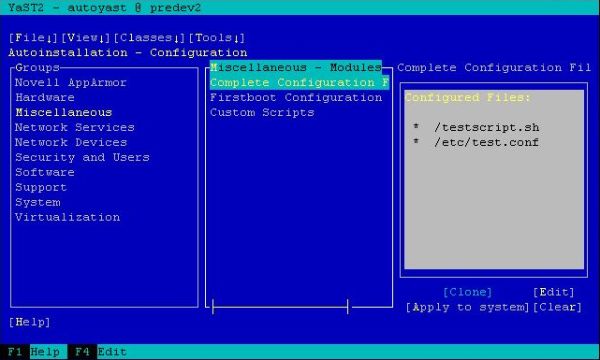
Custom Scripts
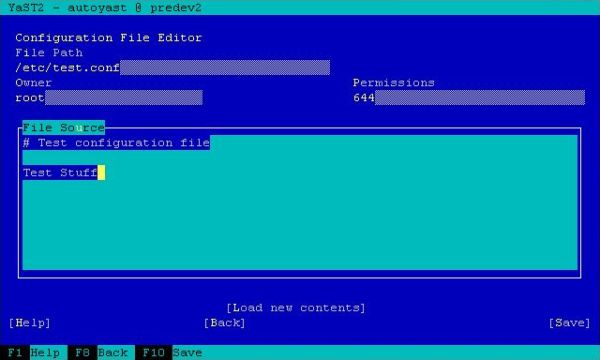
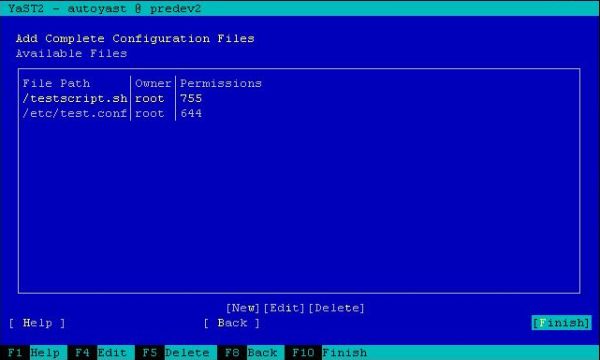
You can use AutoYast to install custom files. This allows you to copy down configuration files to the installed machine, inject ssh keys whatever your imagination lets you do.
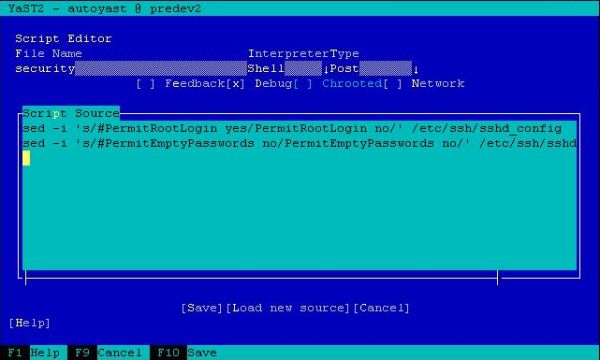
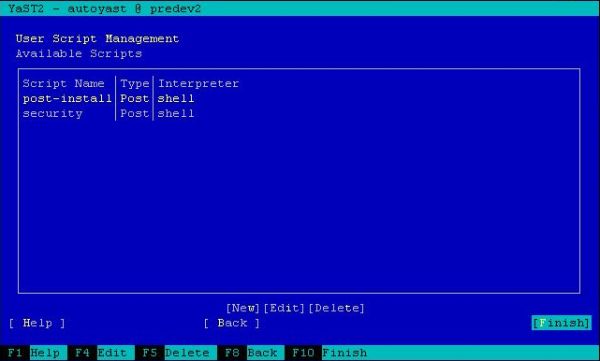
The other part is Post Install scripts which run during installation, this is used to run custom installers (ie wget a custom module and compile, or rsync webfiles, etc).

Finishing Touches
The final thing to do is decide if you want the autobuild script to require confirmation, by default the installer will show you the proposed setup before installing requiring you to actually click the install button, if this is how you want it then by all means have a look at the other configuration options available to you before we head into the machine installation section in the next part of the series.
If you do want everything to be automatic then goto the “System – General Options” section then edit.
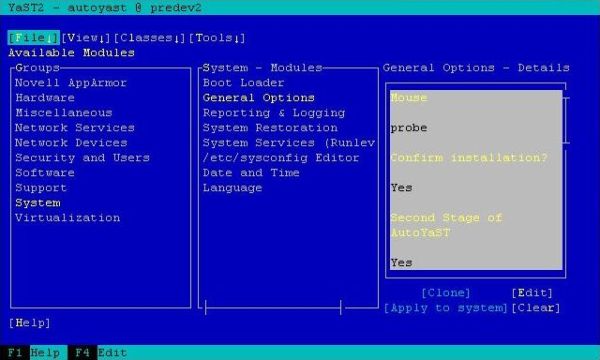
Just click next on the Mouse Configuration (unless you want to change something). Then set “Confirm installation?” to off. Click Next then Finished (F10 in CLI mode).
And your done. Check back for the next part when we look at actually doing a machine install.
2 replies on “OpenSUSE AutoYast/AutoInstall Howto Part 2”
Hey Jon,
would you be so kind and provide the “Demo SUSE AutoInstall XML File” again, the link is not working anymore.
thx in advance.
Link “Demo SUSE AutoInstall XML File” does not work.
This is a very interesting tutorial.